Data catalog
Overview
The data catalog in Analytics Platform (AP) is a comprehensive inventory system that organizes and manages information about your data assets. This system is integral for users to understand the types, sources, and characteristics of data integrated within the platform.
A data catalog serves as a central repository where all your data assets are systematically cataloged. In AP, the data catalog provides metadata, management features, and search capabilities, enabling users to quickly locate and understand data across various sources. It details the data origin, format, and the relationships between different datasets, making it easier to navigate and manage large volumes of information within the organization.
The primary utility of the data catalog lies in its ability to provide a central inventory of datasets and sources, which simplifies data governance and enhances the efficiency of data management practices. It ensures that users have access to reliable and up-to-date data descriptions, fostering better decision-making and streamlining data utilization across projects. By centralizing data knowledge, the data catalog reduces redundancy and improves data quality.
The terms dataset, data source and data pipelines are used somewhat interchangeably in this guide.
Audience
The data catalog is designed for use by various stakeholders within an organization. Data engineers and data integration specialists benefit from it by gaining insights into available data sources and how they can be best utilized and integrated. Analysts and data scientists use the catalog to find relevant datasets for their analytical work, ensuring that they are working with the most appropriate and up-to-date data. Additionally, business users and decision-makers rely on the catalog to verify that the data they base their strategic decisions on is accurate and comprehensive.
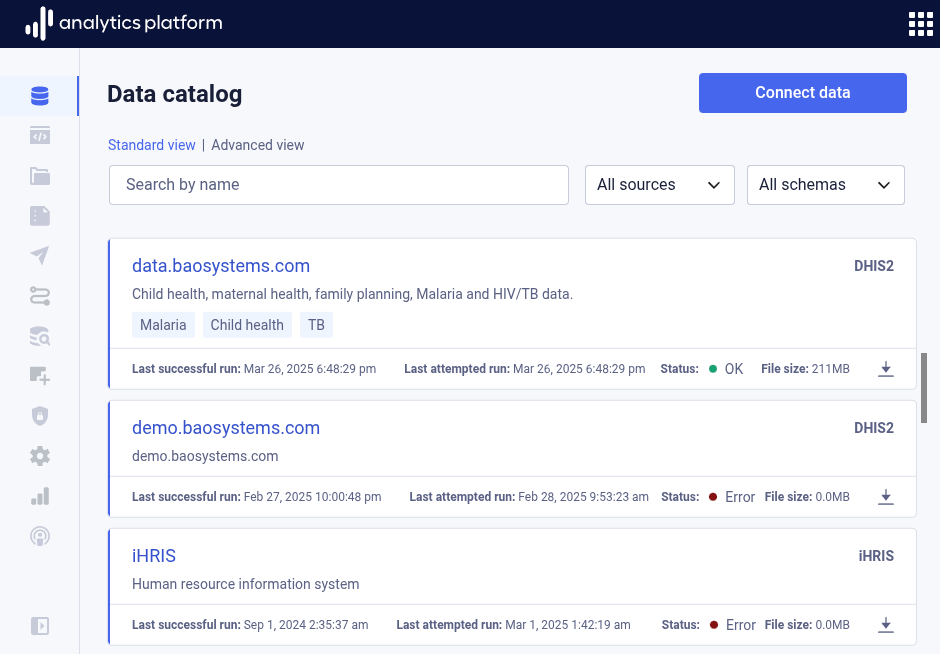
View data catalog
- Click Data catalog from the left-side menu to open the data catalog and view datasets.
- Use the source All sources drop-down at the top of the page to filter datasets by source type.
- Use the schema All schemas drop-down at the top of the page to filter datasets by schema.
- Click the name of the dataset to view more information.
Connect data
To connect data sources and bring datasets into the data catalog, click Connect data from the top-right corner. This will open the data pipeline dialog. Consult the Data pipelines page to learn more about connecting data sources.
View dataset
The dataset overview screen provides comprehensive information about the dataset.
Details
The Details tab displays metadata such as owner and URL, and the username of the user who created and last modified the dataset.
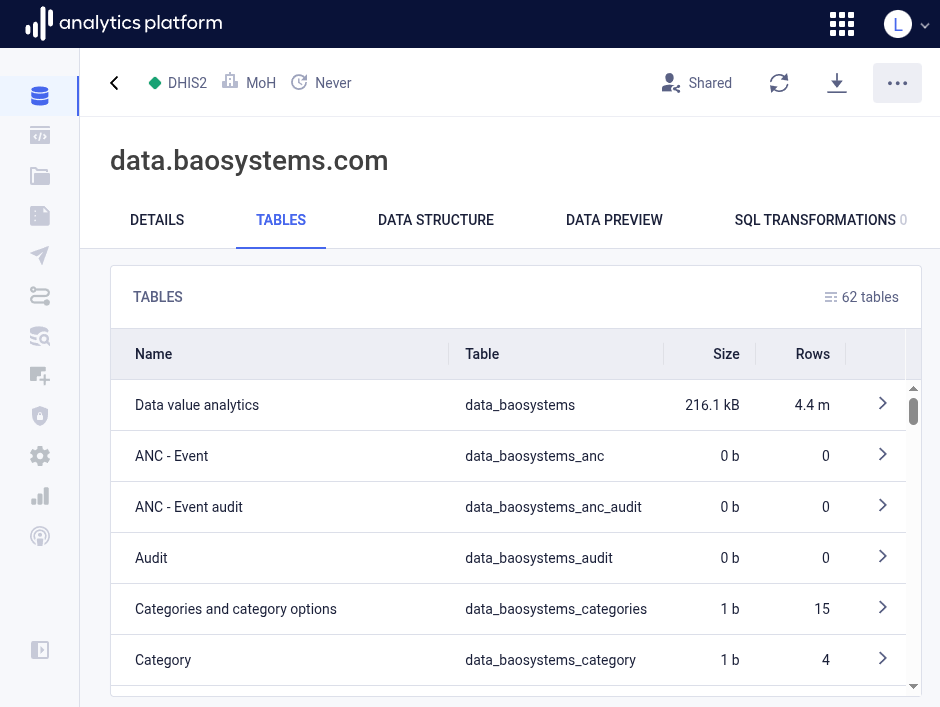
Tables
The Tables tab shows a list of all tables for the data source. Data pipelines can generate one or many tables. As an example, a DHIS2 data pipeline will typically generate a large number of tables, including metadata, data, enrollment and event tables. The tables list allows you to get an overview of which tables exist. Clicking on table will display the data structure, meaning the list of columns for the table.
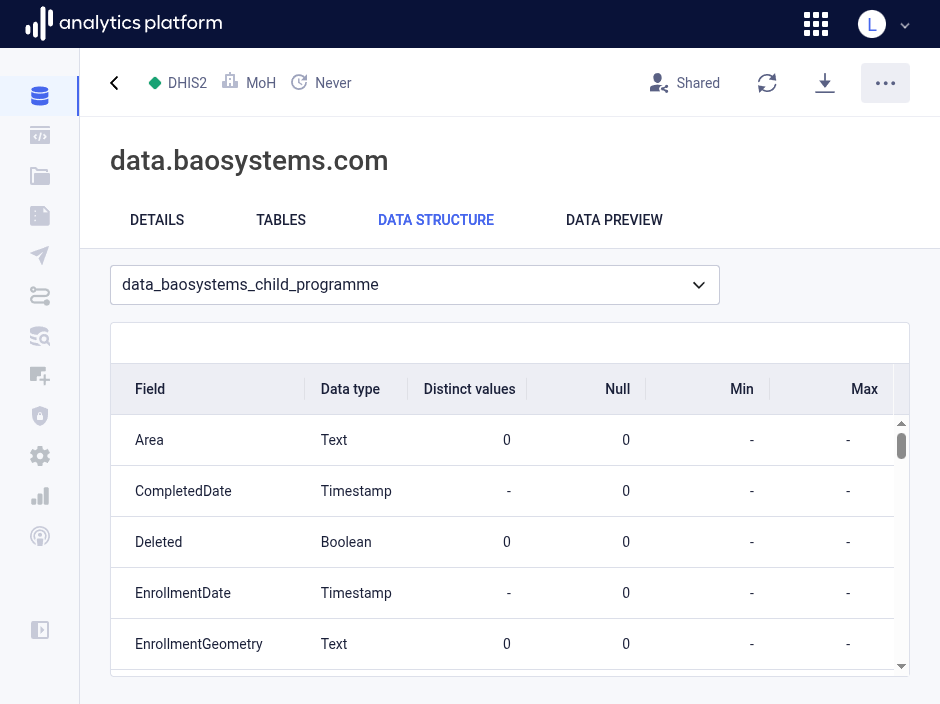
Data structure
The Data structure tab shows the structure of the table as a list of columns for the selected table. For each column, the data type, number of distinct values, null (blank) values, min and max value are displayed. Min and max value only apply to numeric data fields.
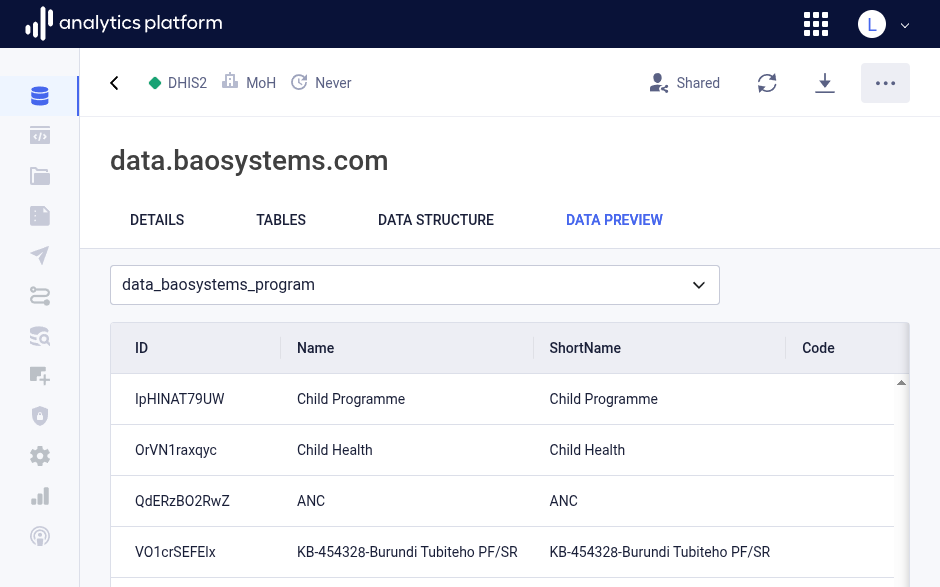
Data preview
The Data preview tab displays the first 50 rows of the table. This is useful to get an overview over what type of data exists in the table.
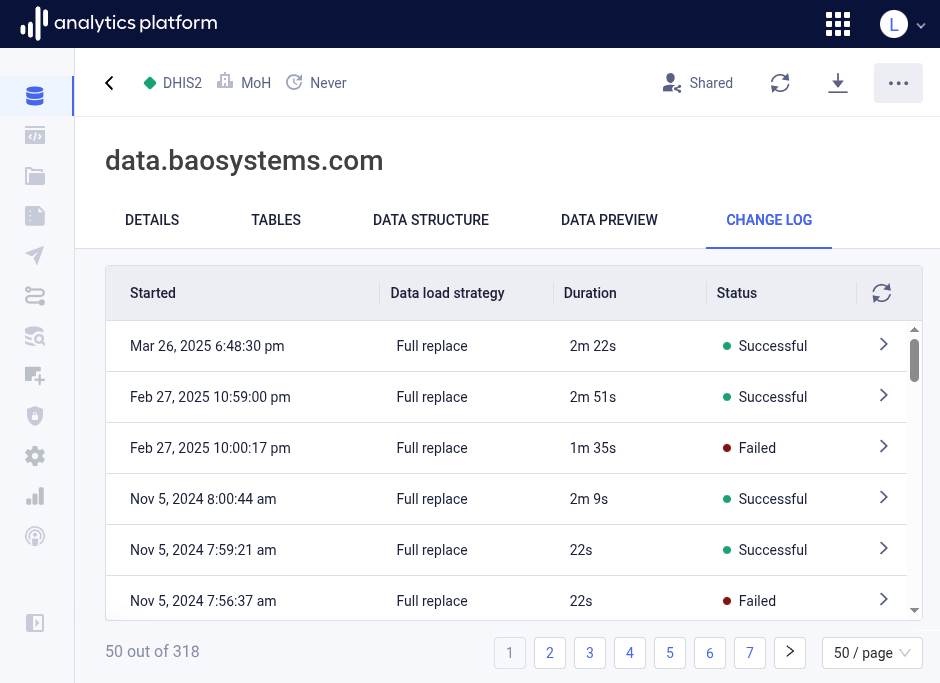
Change log
The Change log tab displays an overview of data load tasks for the data pipeline. A task represent a single data pipeline run. For each task, the start time, data load strategy, duration and status are displayed. The data load strategy can be Full replace or Incremental append. The Incremental append strategy is only relevant for data pipelines for which data is continuously updated. The status will be In progress when a task is running, then Successful when a task completed successfully, and Failed when a task failed with an error.
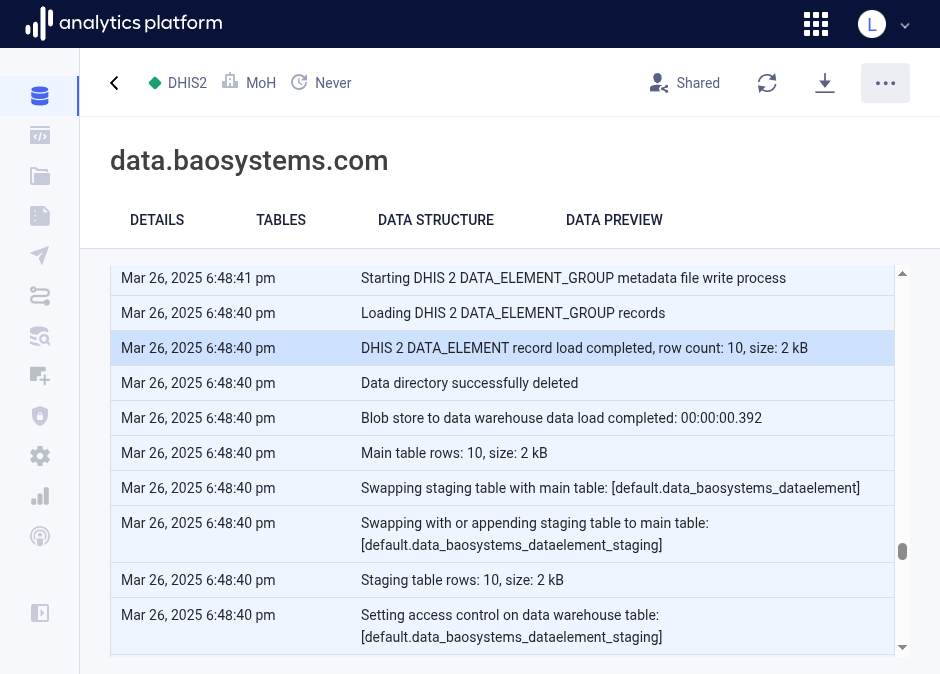
Task log
You can click on a task row to view logs for the task. The logs provides detailed information about the data load process, and includes the tables which were created and loaded, the count of data records, the runtime for each table data load, and more.
Edit dataset
A dataset can be edited after it has been created.
- Open the context menu by clicking the icon in the top-right corner.
- Click Edit dataset.
- Edit values in the relevant sections.
- Click Save at the bottom of the section.
- Close the dialog by clicking the close icon in the top-left corner.
Share
Access to a dataset can be controlled by setting the appropriate sharing permissions. A dataset can be shared with everyone in the organization, referred to as public access, with user groups and with users. Users can be given view access or edit access. Edit access implies view access. Refer to the sharing page for sharing and access control documentation.
Download dataset
The data files used to load data to the data warehouse is available for download in CSV format.
- Open the context menu by clicking the icon in the top-right corner.
- Click Download data in the context menu. This will open a dialog that displays the available data files for download.
- Click the download icon next to a file to download it.
- Click the link icon next to a file to copy the link / URL to the file.
Note that the downloadable data files are in compressed CSV format. The files are compressed with the gzip tool. Tools for decompression exist for all operating systems. For MS Windows, 7-Zip is a free alternative. For Mac and Linux, use a terminal with the gunzip command, e.g. gunzip data.csv.gz.
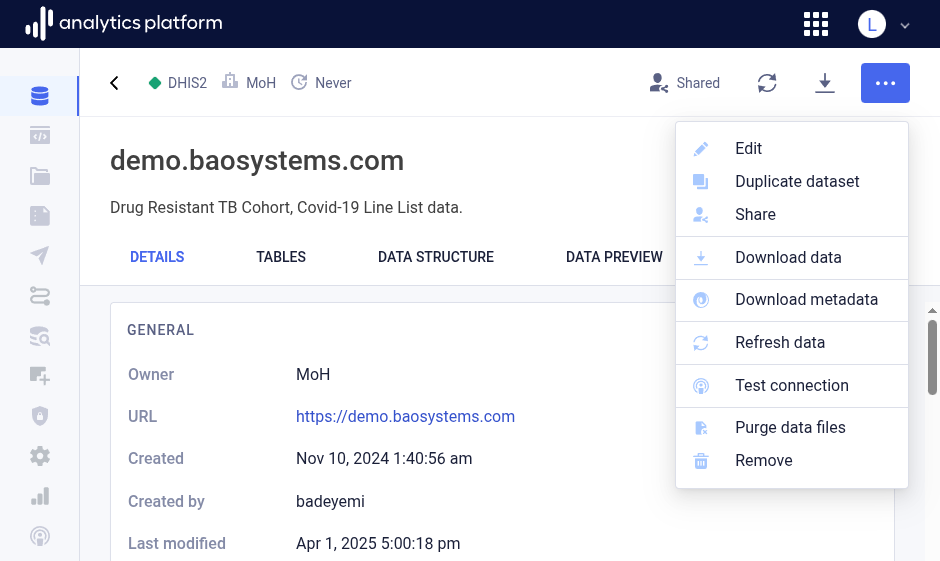
Download metadata
Metadata for the dataset is available for download in JSON format.
- Open the context menu by clicking the icon in the top-right corner.
- Click Download metadata.
Refresh data
Data for the data pipeline can be manually refreshed. This will load data from the data source into the platform and data warehouse. Note that data pipelines will typically be scheduled to refresh automatically. This can be set in the create and update data pipeline screens.
- Open the context menu by clicking the icon in the top-right corner.
- Click Refresh data.
Test connection
After setting up a data pipeline, it is useful to be able to test that the connection is valid.
- Open the context menu by clicking the icon in the top-right corner.
- Click Test connection.
Purge data files
Every time data for a data pipeline is loaded into the platform, the data files used to stage and load data are retained. If underlying data has changed, for data protection and compliance reasons, it may be necessary to purge the data files for each data load process in order to have a fresh start.
- Open the context menu by clicking the icon in the top-right corner.
- Click Purge data files.
Remove data pipeline
A data pipeline, including data files and data warehouse tables, can be removed when no longer needed.
- Open the context menu by clicking the icon in the top-right corner.
- Click Remove.